Last update: June 2001
Some of the projects of my quilt groups
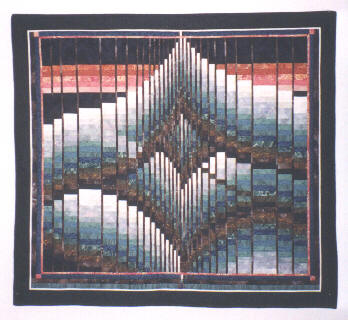
Fractured Landscape Quilts
In March 2001, a collegue and quilt friend offered to take me along to a quilt class at the quilt shop on the Army
base close by. Subject of the class was "Fractured Bargello". What tempted me was that the technique to be used was "Quilt as you go",
where you sew the individual bargello strips together and at the same time sew them to binding and backing in one go. So, when you've sewed
on the last strip of the border and added the binding, the quilt is done! There were four of us, and here are three of the resulting quilts.
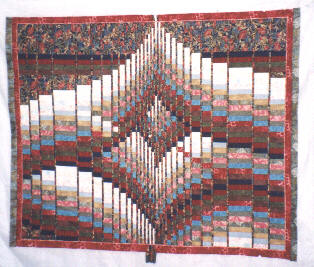
My Fractured Landscape Quilt.
My friend's version. The outer borders are still missing.
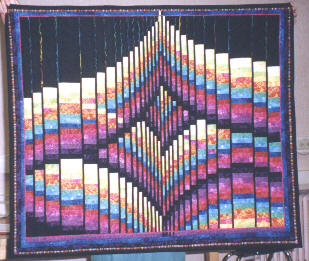
Fractured Landscape version in Carribean colors. This picture does not do the quilt justice - in real life, the colors really sparkle! Round Robin Experience
I belong to two quilt groups - one where I am the youngest, and one where I'm the oldest. Both are great fun, and
I've learned tremendously from both. In 1999, both groups ventured into a round robin experience for the first time. Both the
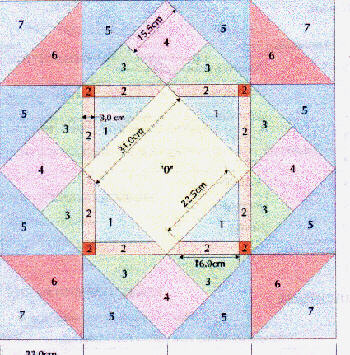
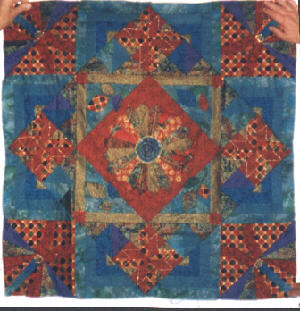
experiences made and the resulting quilt tops varied immensely. The pattern we all received is shown below.
And these are the resulting round robin quilts from my young quilt group. Since we were only five, each of us was to sew
two successive steps at a time, and we had added the rule that if the instructions really did not fit the design, we were free to modify
it. For example, if the next two steps called for log cabin triangles and squares with stars, and this made the quilt too busy, we
could decide to use plain fabric instead of making log cabin triangles. Basic rule was that design harmony outranked instructions.
Each of us would add the final borders to her own quilt at the end.
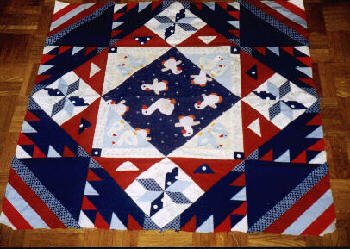
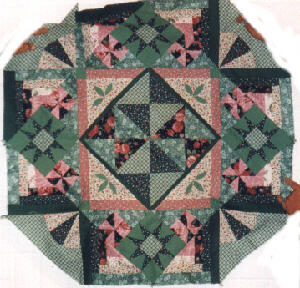
Martina's round robin. She wanted a quilt for her newborn daughter, so we added designs the would be fun to look at for the baby.
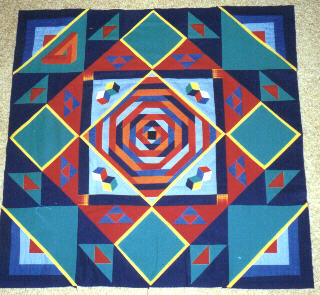
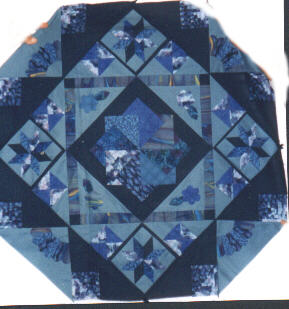
Anke's round robin. She designed the center piece on the PC and sewed it over freezer paper. Her round robin turned out very 3D. As you can
see, she has started adding 3D Escher triangles in the green corners.
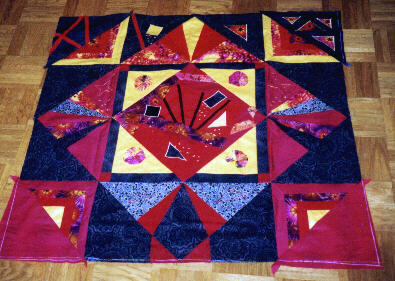
Renate's round robin. An abstract picture in red and black that really sparkles. The picture does not do the true colors justice.
We were glad she had tacked a little piece paper on one end of her
centerpiece that said "top", though!
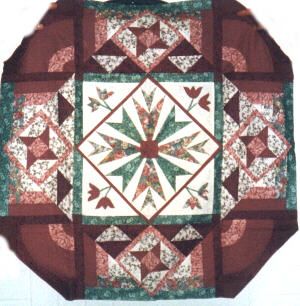
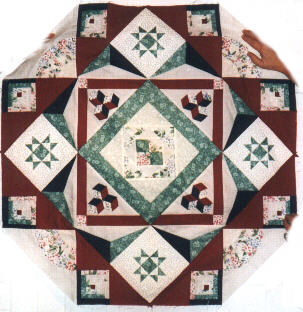
Petra's round robin. This is my personal favorite. Petra appliqued a beautiful scene as a centerpiece, and we decided we needed to
be very careful not to overpower it with the surrounding patterns. So, we basically added triangles in all the outer borders. On this
quilt, we ignored the instructions the most - it shows what an unruly and creative group we are, doesn't it? :-))
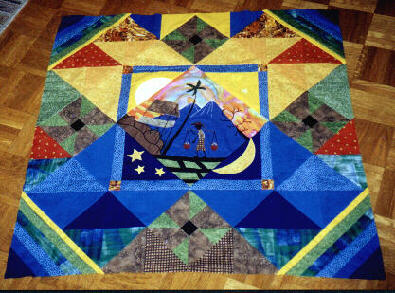
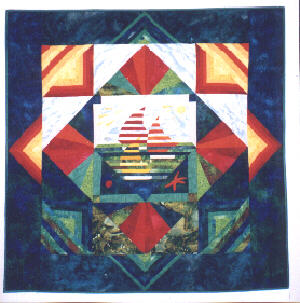
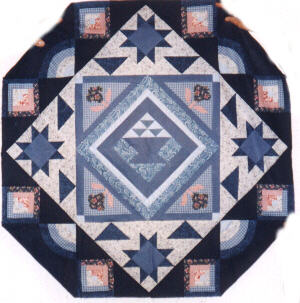
My round robin. As I was sitting in a boring meeting at work, I absent-mindedly stared at a collegue's T-shirt - it had sail boats
in a stripey fashion on the front. Bingo - my round robin center piece design was born! I love the way the group added the water/sky
design. This picture shows mine with the borders already added. The striped triangles were leftovers from one of the round robin
steps, and I decided they were way too pretty to be discarded, so I added them into the border. Round Robin Experience, Part 2
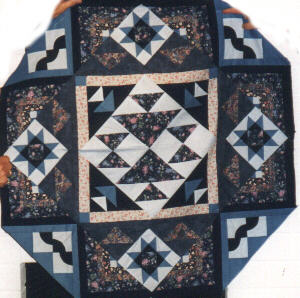
Below are the round robin quilts made by my other group. In this group, everyone followed the same instructions as in
the other group, but without variations.
There was a lot of sighing and grumbling, and lots of insecurity along the way - noone really thought the resulting quilts
would be nice - and somehow, it shows. All of the tops are beautifully sewn, but the overall design is sometimes a bit busy. However,
we learned a lot about design, what and how much fabrics to provide, and when to ignore instructions in the future! The final corners
and borders were added by the owners at the end - unfortunately, I only have a picture of what mine looks like in the end. Some
of the others are still hesitant on whether to finish theirs :-((
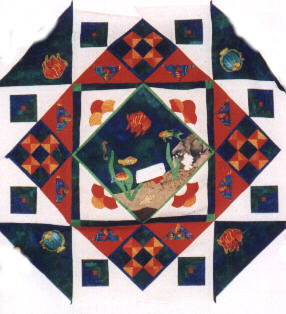
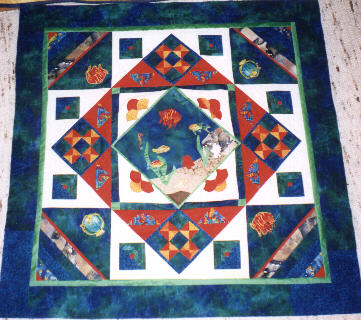
This one is mine - on the left, you can see what it looked like when I got it, and the picture on the right
shows what it looks like with borders. I love it!
Size: 115 cm x 104 cm / 45" x 41", started in March and finished in April 2001.
Each one of us was to create the center panel (it could be pieced or appliqued) and put it and the fabrics she wanted the others to use in a plain
bag. Then at the next meeting, the round robin coordinator collected all the bags, made a switch list, and we were each given
an "anonymous" plain bag with the task to sew the next step according to instructions. At the next meeting, we switched bags
again, and so on, until we all had had each project exactly once. At the final meeting, we all saw all projects in the final stage for
the first time, including our own. Since one person dropped out, the final corner pieces were still missing, so we decided each
of us would sew them onto her own round robin project.